
Mastering React: Design Patterns and Tricks for Junior Developers
Discover React Design Patterns and Best Practices in this tutorial for junior developers. Learn how to build more efficient and maintainable applications with straightforward tips. Master React and enhance your web development skills today!
As a developer gaining experience, you will inevitably encounter the term “software design patterns” at some point in your career. Generally speaking, these are “templates” (metaphorically) that provide standardized solutions to common problems. Studying these patterns will enable you to identify when to use them and how to leverage them effectively, which can significantly improve code efficiency and maintainability, prevent errors, and optimize development time.
Broadly, there are countless software design patterns, for example:
- Observer Pattern (Pub/Sub)
- Proxy
- Bridge
- Factory
- Builder
- Composite
- Visitor
- Singleton, etc.
In this context, I won’t delve into any of these specific patterns, but it’s valuable to recognize and be aware of their existence. A good reference for these and many more can be found at Refactoring Guru.
Many of these patterns are more focused on general system design or are straightforward to understand and apply in backend development, but this isn’t always the case for the frontend. Sometimes, “translating” them into frontend implementations can be challenging.
Therefore, in this post, I will focus on several React design patterns that facilitate building maintainable frontend applications and help avoid future headaches.
React Design Patterns
In React, various design patterns and best practices exist to help you build scalable and easily maintainable applications. Here’s a list with a concise explanation for each:
-
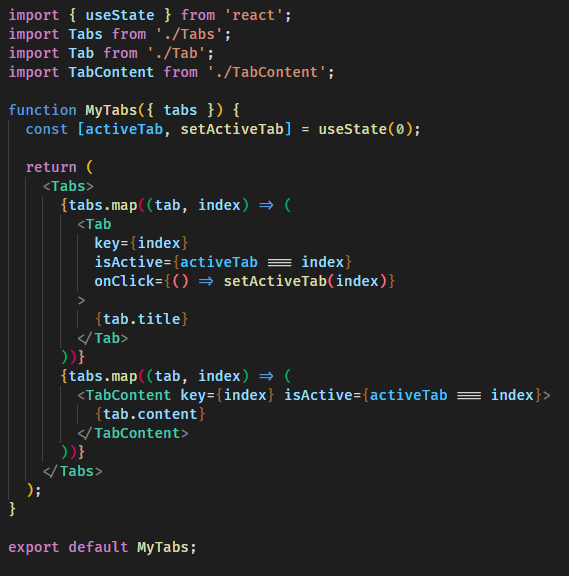
Component Composition:
- Best Practice: Create small, reusable components, keep logic individually separated, and make each small component easy to maintain.
- Why: It’s like playing with building blocks; it’s easier and more organized.
-
Container and Presentational Components:
- Best Practice: Divide components into two types: one for data and logic, and another for appearance. This way, if something changes in either the presentation or data layer, it doesn’t affect the other, keeping them decoupled. It also helps maintain readable code.
- Why: Keeps your code clean and simplifies testing.

-
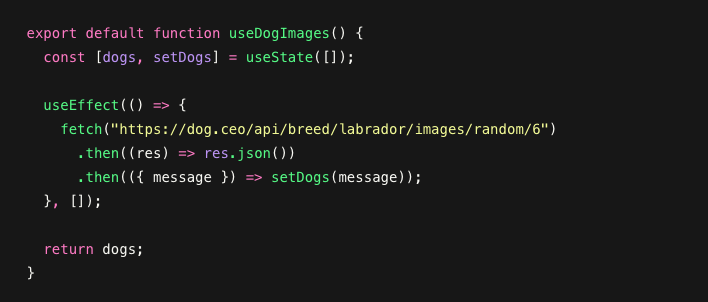
Higher-Order Components (HOCs):
- Best Practice: Wrap components with an HOC to add extra functionalities. In simple terms, an HOC is a function that takes a component as an argument and returns a new component with added data or functions. For instance, you could add the currently logged-in user to a component, keeping that logic isolated and only applying it to components that require it.
- Why: Think of it as granting superpowers to your components when they need them.
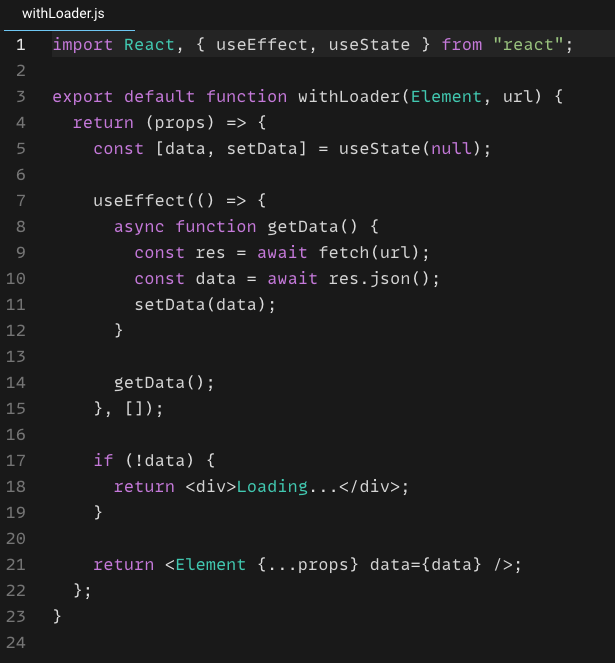
Add a loader to any component, and it mounts once the data is available. You can pass any component as a parameter; it only needs to be able to receive aprop "data".
-
Render Props:
- Best Practice: Pass a function to a component’s
rendermethod. This allows the “rendering” logic to be controlled when the parameter is passed, enabling you to handle multiple presentation formats with the same underlying logic. - Why: This provides significant customization capabilities for your components.
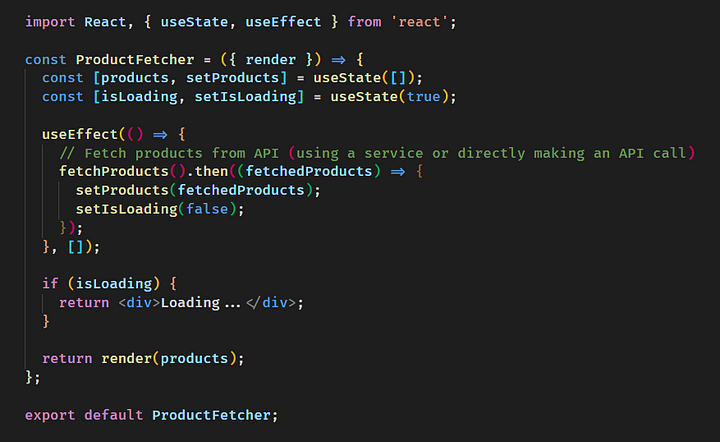
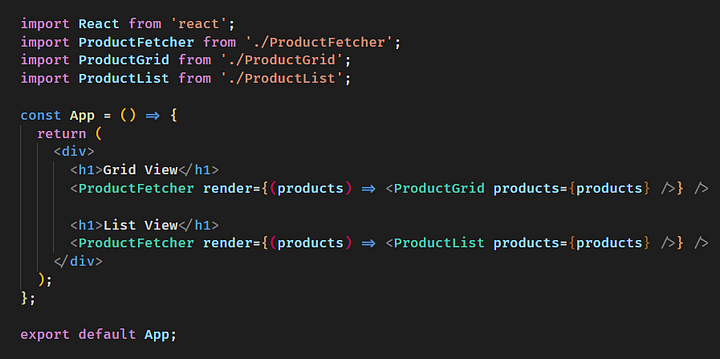
- Best Practice: Pass a function to a component’s
-
State Management with Context API and Redux:
- Best Practice: Manage data from a “global” store. If there’s any change anywhere in the app, the central store automatically updates, eliminating the need to pass results component by component. Redux Toolkit is a good example of this.
- Why: Keeps your data organized and avoids passing data through many components (preventing messy
prop drilling).
-
Controlled Components:
- Best Practice: Store form data in a parent component. This way, the component receiving the data doesn’t need to know how the data is updated or managed; its sole focus is on displaying (rendering) it.
- Why: Provides better control over your form data and behavior.

-
Conditional Rendering:
- Best Practice: Use conditions to show or hide parts of your interface.
- Why: Allows you to dynamically change what users see, making your application interactive.
-
Error Handling with Error Boundaries:
- Best Practice: Wrap sections of your application to catch errors.
- Why: Prevents the entire application from crashing when an error occurs.
-
Virtual DOM:
- Best Practice: Understand how React efficiently updates the actual page.
- Why: It’s like having an intelligent assistant that makes your application faster without you having to do all the work.
This merely serves as a brief introduction to each pattern. I recommend thoroughly reviewing and researching each one to master them and apply them effectively when needed. Dev.To has a good summary of these (in English).
These best practices and design patterns are essential tools in your programming toolkit that will help you build amazing web applications, one step at a time. 🧰🚀👩💻